Understanding aperture and its use in photography is one of the key elements that build up the exposure besides the shutter speed and the ISO. Getting to grips with taking an evenly exposed photo is a lot easier when you understand the aperture. As you develop your photography skills, you will want to have more control over your camera. You will leave behind auto modes and start shooting in manual modes like aperture and shutter priority. You can bring out the best of your photography by controlling all three settings of the exposure triangle manually. In a lot of cases, the aperture has the biggest impact on a photo as using different apertures also opens up more creative avenues. This blog will teach you what they are and how to use aperture to your advantage.

What Is Aperture?
The easiest definition for aperture is to say that it’s the opening inside of your lens. This adjustable “hole” in your lens is also called the diaphragm and if you take a closer look at your camera’s lens, you should see something like this:
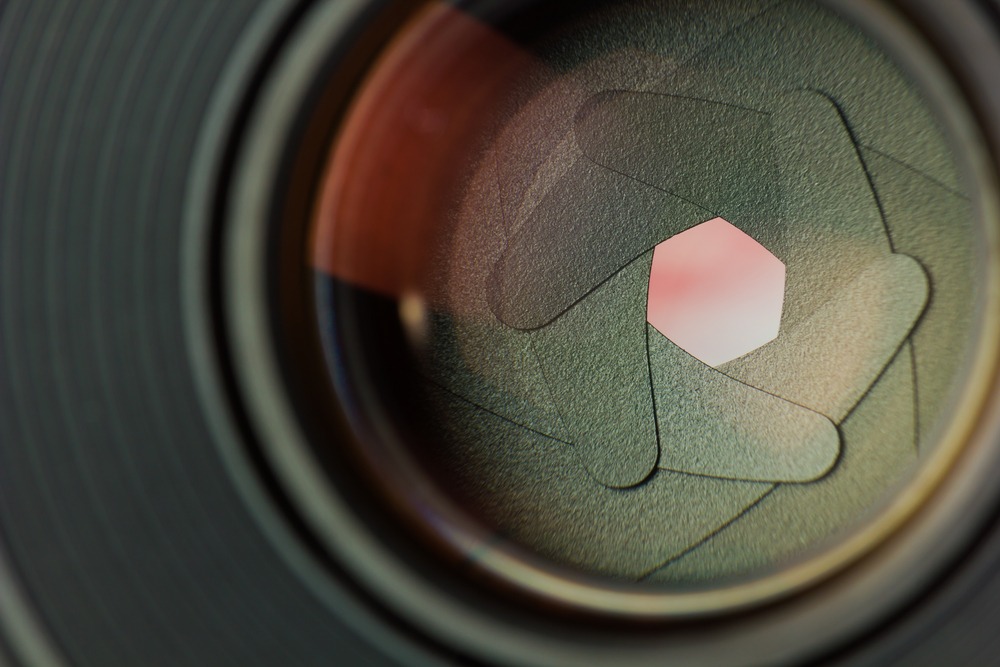
The best way to understand the aperture definition is to think of it as the pupil of an eye. In low light conditions, the pupil is wider letting in as much light as possible. When there’s too much light, like direct sunlight, it shrinks to compensate for the amount of light. In photography, the lens of your camera works just like this. Let’s follow this analogy. Would you use a wide or narrow aperture to photograph a darker scene like a beach after sunset? You should already know the answer to this question. But if not, I’ll give you a little hint: If you enter any dark place, your pupil widens up. As the diameter of the aperture size changes, it allows more or less light onto the sensor.
How to Understand the Aperture Values
Aperture can be confusing sometimes. Some people will say a wide or narrow aperture, but others might say a large aperture number or a small one. What is the difference? A wide aperture refers to the wide opening in the lens, where an aperture like f/1.2 or f/1.8 is being used. Don’t worry if you don’t understand what these f/numbers are yet. This will be tackled in the next section, just follow along. A larger aperture number refers to the number of f/stop when f/16 or f/22 is being used. A large aperture number and a narrow or a small aperture are the same things. One talks about the size of the number and the other relates to the size of the opening in your lens.
How Is Aperture Measured and Changed?
In photography, the aperture size is measured using something called the f-stop scale. On your digital camera, you’ll see ‘f/’ followed by a number. This f-number denotes how wide or narrow the aperture is. The size of the aperture affects the exposure and depth of field (also tackled below) of the final image. What may seem confusing is that the lower the number, the wider the aperture. This means that your camera aperture settings will be wide open at a smaller f -stop number, like f/1.4 (usually this is the maximum aperture of a lens). At higher numbers, like f/16 or f/22, you’ll get a narrow, small aperture. Why a low number for a high aperture? The answer is simple but mathematical, but first, you need to know the f-stop scale.
The scale is as follows: f/1.4, f/2, f/2.8, f/4, f/5.6, f/8, f/11, f/16, f/22.
The most important thing to know about these numbers is the following. As the numbers rise, the aperture of the lens decreases to half its size with every stop. Half meaning that it allows 50% less light through the lens. So if take an f-stop like f/2.8 and change it to f/4 our image will have two times less light than at the starting aperture size of f/2.8. Aperture numbers come from an equation used to work out the size of the aperture from the focal length. You’ll notice on modern-day cameras that there are aperture settings in-between those listed above. These are called third or 1/3 stops, so between f/2.8 and f/4 for example, you’ll also see f/3.2 and f/3.5. These are just here to increase the control that you have over the amount of light entering your cameras.
How to Change Your Aperture
Now that you are aware of how the aperture is measured, we can take a look at how you can change it on your camera. At this point, it’s important to mention that you don’t always have full control over your aperture. This happens on some so-called variable aperture lenses.
Variable Aperture Lenses
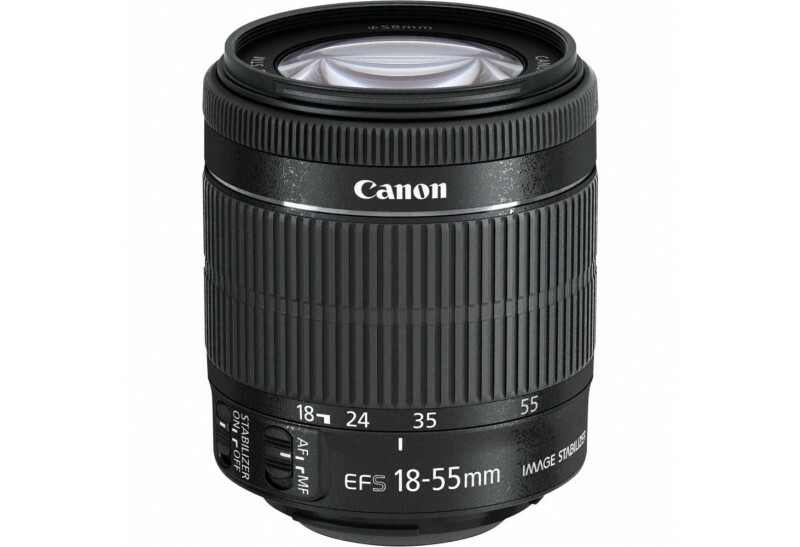
Variable aperture lenses are usually cheaper zoom lenses. The reason they are called variable aperture lenses is that the smallest aperture changes with the focal length. Most kit lenses just like the 18-55mm f/3.5-5.6 kit lens come with a variable aperture. This means that on smaller focal lengths like 18mm you can set the maximum aperture of f/3.5. As you zoom in with the lens and reach longer focal lengths, the maximum aperture you can set will decrease. If you reach the longest focal length, in this case, 55m, the widest aperture this lens can produce will be f/5.6. This could be very hard to deal with as in low light conditions. When you put this into practice, you will see that even f/3.5 can be insufficient when you have less light to work with.
Most professional photographers tend to use prime lenses. Prime lenses are fixed focal length lenses (this means that you can’t zoom with them). They are usually capable of very large aperture openings like f/1.8, f/1.4, or even f/1.2. These are quite handy when you need to shoot in low light or want to achieve a very shallow depth of field. Prime lenses are usually more expensive and often there can even be a big price difference between two prime lenses with a difference of one single f-stop. This is because one single f-stop can make a huge difference to the amount of light entering the camera. Once you reach your lenses maximum aperture, you’ll only have two options to compensate for a dark exposure. One is shutter speed, and the other is ISO. Most of the time, you can’t just tweak these further, especially if you don’t have much light. Bringing up the ISO will make your image very noisy. And slower shutter speeds can make any movement of your hands/camera or subject very obvious as blur in your final image.
Now, back to the topic of how to change the aperture in your camera. On modern digital cameras, you may have noticed that there are certain modes. These modes include “Auto”, “P”, “Tv”, “Av” and so on.

Full Auto Mode
Now in Full-Auto modes, you can’t adjust any of your exposure settings. Your camera sets the optimum aperture, ISO and shutter speed for you. Remember, it always tries to compensate for a “perfect” exposure.
Aperture Priority (Av / A Mode)
In Aperture priority mode, you can set your aperture to a certain f-number. In the meantime, your camera compensates with setting shutter speed and ISO automatically. This mode is useful if the priority (as in the name of the mode) is your aperture. Let’s say you want to achieve a large depth of field (I’ll come back to this later). For this, you want to keep smaller apertures (like f/8 or f16). If you choose aperture priority mode and fix your f stop, you won’t have to worry about any changing light conditions. You will get the same exposure every time you release the shutter button as the camera will change the shutter speed to compensate for your setting and ensure you get a correct exposure. Keep in mind that if you’re shooting with such a small aperture, the compensation in shutter speed might be very radical. Your camera can even set the shutter speed close to a whole second or more. All in all, aperture priority is a good choice when you have a lot of light. This way, you don’t have to worry about how your camera changes the shutter speed for you.

Creative Impacts of Aperture (Depth of Field)
The main creative effect of aperture, however, isn’t exposure, but depth of field. Depth of field is a big topic in photography. Apart from causing a difference in exposure, adjusting your aperture affects the depth of field, and this is where things get a little bit more interesting and a little bit more creative. Now you may be asking yourself, what is depth of field? Well, in short, it is the distance at which the subject will stay in focus in front of and behind the main point of focus. If you set a large aperture and take a picture, you will see that the area of focus will be very small. This is called a shallow depth of field. Keep in mind that the focal length of your lens and your distance to your subject also make a difference. The opposite of shallow depth of field and wide aperture is a deeper depth of field. You can achieve this by setting smaller apertures like f/16 or so. Smaller apertures will produce a sharper image and a greater area of focus.
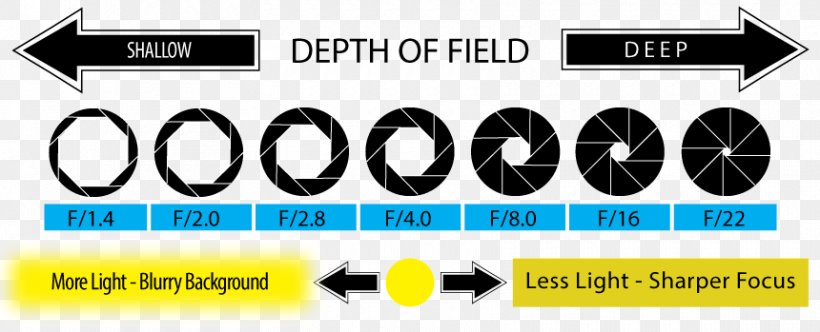
Let’s take a look at the diagram above. If you don’t understand exactly how this works, don’t worry. The pictures below will make it clear. For now, it’s important for you to know the effects and understand how the depth of field changes. The photos in the GIF below are in this order: f/2.8, f/4, f/5.6, f/8, f/11, f/16, f/22. See how the depth of field increases every time the aperture size is decreased.

You can get very creative with choosing different aperture settings for changing the depth of field. Large aperture openings can have very interesting effects on the image. Most of the time, they are used to create a soft and blurry background. This is a nice way of separating your subject from the background. This technique can also create great depth and give a lot of mood and emotion to your image. Shallow depths of field helps the viewer to really focus on the subject, but you should be careful with it. At very small aperture numbers like f/1.2, your area of focus can be very narrow. This means that your subject can easily fall out of focus. Even though a nice shallow depth of field can be very pleasing to your eyes, the first priority should always be your subject focus.
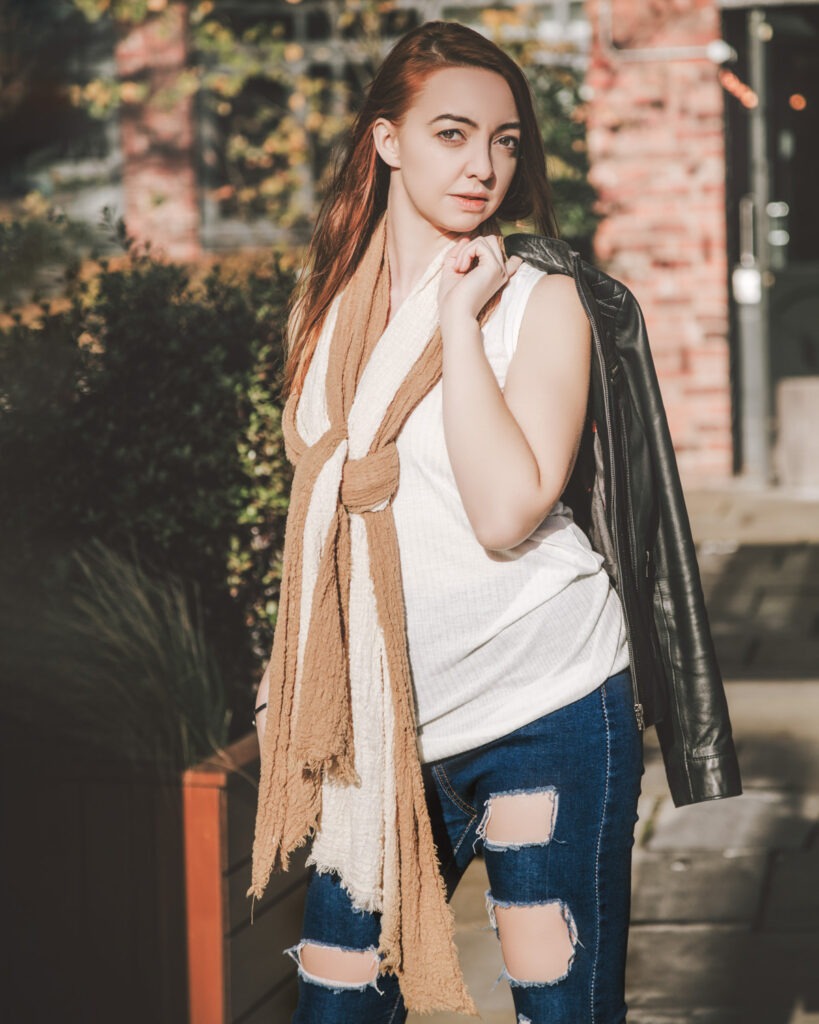
There are no rules when it comes to choosing an aperture just like composition. It depends greatly on whether you are going for artistic effect or to accurately balance the light in a scene. To best make these decisions, it helps to have a good knowledge of traditional uses for the different apertures that I have listed below.
f/1.4 – This one is great for low light situations. It also gives a shallow depth of field. Best used on a shallow subject or for a bokeh effect.
f/2 – This range has much the same uses, but an f/2 lens can be picked up for a third of the price of an f/1.4 lens.
f/2.8 – Still good for low light situations, but allows for more definition in facial features due to a deeper depth of field. Good zoom lenses usually have this as their widest aperture.
f/4 – Autofocus can be temperamental. This is a safe aperture setting you’d want to use for portrait photography for nice and more detailed portraits. You risk the face going out of focus with wider apertures.
f/5.6 – Good for photos of one or two people but not very good in low light conditions though. Here, use a bounce flash if you have one.
f/8 – This is good for large groups as it will ensure that everyone remains in focus.
f/11 – More often than not, here is where your lens will be at its sharpest. Good starting aperture for landscape photography and also high-detailed portraits of your subject.
f/16 – Shooting in the sun requires a small aperture, making this a good ‘go-to’ point for these conditions.
f/22 – Best for landscape photography where you want noticeable detail on your subject and the background too.
As I said before, these are only guidelines. It’s only up to you how you use this knowledge in your photography.
Now that you know exactly how the aperture setting will change a photo, you can experiment yourself and have fun with it!


